
Wintertime, for me, means soup, soup, and more soup. But wait! It also means walnuts. “You silly, walnuts aren’t in season right now,” I hear you say. Well, that’s true, but I say, hey, why not use those bagged, shelled walnuts from the market or, if necessary, order a sack online? I don't need much convincing, just a slight nudge or the faintest craving when it comes to walnuts. And so yes, I made fresh milled whole wheat walnut sourdough with roasted walnut oil. I also made soup, but I think you’re here for the bread.
Sourdough with walnuts is something I’ve done in the past with my walnut and cranberry sourdough, and while working on this formula, I was quickly reminded why I love them so much. It starts with the smell: the vibrant, intoxicating aroma that permeates the kitchen when toasted. Then they sit there on the counter, waiting to be used in any recipe but lucky if they make it that far. Gone unchecked, I could finish off a sack of fresh-shelled walnuts in record time — and then you’ll see me clawing through the expelled shells in hopes I may have missed something—an animal.


I ordered two bags of unshelled walnuts for this recipe, and thankfully one of those bags made it out of my grubby hands to mix time. I suggest when you prepare these walnuts shell a few extra grams because you will eat a few just before you toss them into your dough. If you've not had the chance to use walnut oil before, you're really in for a treat. You can not only use it for baking but whisked up in a vinaigrette it adds an intense and complex flavor to your salads that's hard to beat. And to streamline this whole thing eat this walnut sourdough with your walnut-y vinaigrette salad — sure to win over even the pickiest of picky. This is not a cheap bread to make. Good quality, organic walnuts (especially in the shell) can be a costly endeavor, particularly so when out of season. I’ve tried this bread with your run-of-the-mill bagged whole walnuts, and you know what, the bread still tastes fantastic. Still not cheap, but incredible nonetheless. It’s a bread you occasionally splurge on and one you’ll thank yourself for long after that first bite. Let’s get shelling and let's get baking.
Flour & Nut Selection
I milled my organic hard red spring wheat by hand using my GrainMaker 116 manual mill (as I do in my other loaves with freshly milled flour) in the morning around 8:00 a.m. I mixed my levain later that morning and later that day proceeded with my bake—no aging of flour, no soaking of grains.
If you don’t have a grain mill you can certainly use aged whole wheat flour and this bread will still be superb.


If you’re milling your wheat try to mill as finely as your mill will reasonably go. You can see in the picture below how fine I’m able to mill with my GrainMaker and that you can pick out small bran/germ flecks in the flour. As I mentioned above, I’ve tried this recipe a few times using bagged walnuts and also freshly shelled walnuts. I’d say the taste is very similar between the two. Fresh walnuts do have a slightly better taste to them and have far less “dust” (not sure what it is really, small walnut particles?), but shelling them takes quite a bit of effort. If you have access to walnuts in their shell, and a few spare minutes, by all means, give it a try.
Fresh Milled Whole Wheat Walnut Sourdough Formula
Vitals
| Total Dough Weight | 1,700 grams |
| Pre-fermented Flour | 5.00% |
| Hydration | 94.00% |
| Yield | 2 x 850g loaves |
If you want to halve this recipe, divide all the ingredients (including the levain) listed below by two.
Levain Build
| Weight | Ingredient | Baker's Percentage |
|---|---|---|
| 25g | Mature liquid starter (100% hydration) | 50% |
| 25g | Fresh Milled Hard Red Spring Wheat | 50% |
| 25g | Central Milling Type 70 | 50% |
| 50g | Water | 100% |


I used half freshly milled whole wheat and half Central Milling Type 70 for the levain build, but you could use 100% whole wheat if you’d like. When using 100% fresh milled flour, I like to build my levain with a little aged white flour to bring stability and help tame fermentation just a bit.
Dough Formula
Note that the baker’s percentages listed below are with respect to the final dough ingredients and do not take into account the levain.
The target final dough temperature (FDT) is 79ºF.
| Weight | Ingredient | Baker's Percentage |
|---|---|---|
| 830g | Fresh Milled Hard Red Spring Wheat (I used Great River Organic) | 100.00% |
| 9g | Diastatic Malt Powder | 1.03% |
| 758g | Water | 91.28% |
| 18g | Fine sea salt | 2.15% |
| 106g | Mature, liquid levain | 12.82% |
| 170g | Shelled & toasted walnuts | 20.51% |
| 21g | Roasted Walnut Oil (optional) | 2.56% |
Method
1. Levain – 10:00 a.m.
Build the liquid levain in the morning and store somewhere around 74-76°F (23-24°C) ambient.
2. Toast Walnuts – 10:30 a.m.
If using walnuts in their shell, you can toast them either in their shell or removed from their shell. I opted for the latter. Toast the walnuts early on, so they have ample time to cool before you mix them into your dough.
Toast at 350ºF (175°C) for about 10 minutes. They should start to give off a very nice smell and look slightly deep brown. Be careful near the end of the toasting time, as walnuts will quickly go from perfect to burned.
Keep an eye on these walnuts in the oven, if it looks like they are browning quickly, or you start to smell burning, take them out immediately.
3. “Autolyse” (with levain) – 2:30 p.m.
I used the word “autolyse” in quotes because this isn’t a true autolyse (which is just flour + water). Because I’m letting the dough rest for only 20 minutes, I decided to just add the levain along with mixing the flour and water.
Mix flour, water (reserve 50g water for the mix, later), malt, and required levain in a bowl until all dry bits are hydrated. Cover the bowl and store it somewhere warm—around 75°F (24°C)—for 20 minutes.
I’ve found I get much better performance from freshly milled flour if I cut my autolyse time down to 20-30 minutes (instead of my usual 90 minutes). Since the dough is so highly hydrated for this recipe and is already quite extensible1, I don’t see a need to do any longer.
4. Mix – 2:50 p.m.
We want to build a little bit of strength in this dough here at the start. I chose to do slap and fold (see here for my guide to the slap and fold method) for about 4 minutes, just until the dough starts to show signs of a smooth surface. If you aren’t comfortable with slap/fold method or don’t like it, you can do stretch and folds in the bowl until your dough tightens up and becomes tighter, and slightly hard to stretch out and fold over. Medium development.
When finished slapping & folding, sprinkle the salt on top of the dough and use the remaining water to help dissolve. Pinch through a few times and fold the dough over itself to help incorporate.
Transfer dough to a tub or thick-walled bowl for bulk fermentation.
5. Bulk Fermentation – 2:50 p.m. to 6:50 p.m.
At 74-76°F (23-24°C) ambient temperature, bulk fermentation should go for about 4 hours. Perform three sets of stretch and folds during the bulk (adding cooled walnuts and oil after the second set), spaced out by 30 minutes. Be very gentle with your stretch and folds (especially the last set). Lift just enough to fold the dough over itself, long before it feels like it would tear.
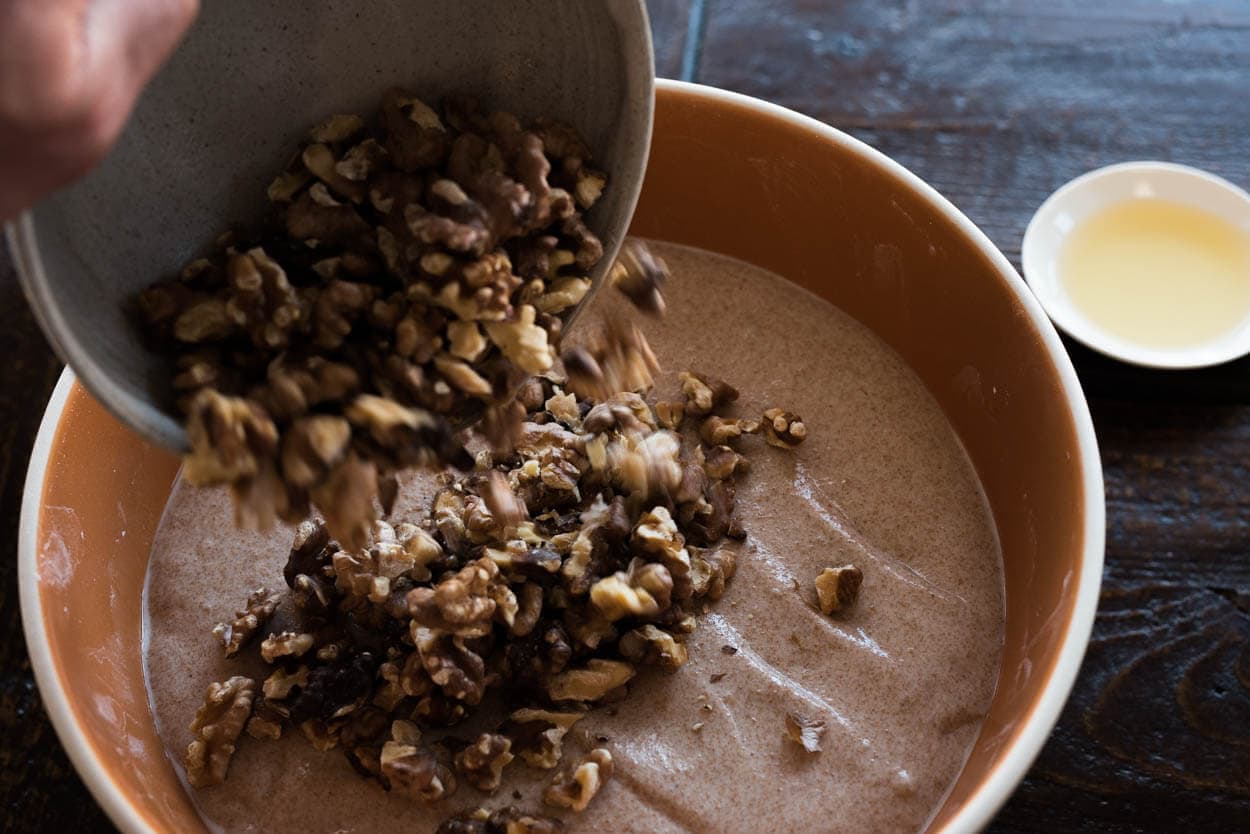
After the second set of stretch and folds sprinkle your toasted (and now cooled) walnuts over the dough, pour over the walnut oil if using, and wet your hands with a bit of extra water. Gently fold over the dough to incorporate the walnuts and oil several times until the walnuts feel mostly mixed through.
After the third set of stretch and folds, performed gently as the dough now has a bunch of walnuts within, let rest for the remainder of bulk. The dough will not rise an incredible amount, but it should be slightly jiggly and some bubbles on top and sides.
6. Divide & Preshape – 6:50 p.m.
Dump out the dough onto a lightly floured surface and divide the dough into two masses. Lightly shape each mass into a round, cover with an inverted bowl or moist towel, and let rest for 20 minutes. After, remove the towel or bowl and let the dough rest five more minutes exposed to air.
7. Shape – 7:05 p.m.
Lightly flour the top of your dough rounds and flour the work surface. Flip each round and shape into a boule. Try to get some proper tension on the top of each boule, but don’t over-handle the dough (easier said than done, I know). After shaping, let rest on the bench for a few minutes and then place it into a banneton that was very lightly dusted (see note below) with white rice flour, seam-side-up.
I prefer to use linen-lined bannetons for this extremely wet dough: it removes easier from the basket, and any liquid that escapes from the dough will go into the linen, which is far easier to clean. I mentioned very lightly dusting the linen with white rice flour—that’s important! If you over-dust the linen, it will become soggy and stick to the top of your bread most unpleasantly.
8. Rest & Proof – 7:30 p.m.
Cover your banneton with plastic and let the dough rest on the counter for 20 minutes. Then, retard in the refrigerator at 38°F (3°C) for 15 hours.
9. Bake – Next Morning: Preheat oven at 9:00 a.m., Bake at 10:30 a.m.
Preheat your oven to 450°F (230°C).
Score these loaves rather deep, with the blade at a 90° angle to the dough. I chose to make a “box” pattern that seems to work quite well but feel free to be creative.
Bake 20 minutes and then remove the steaming pans (or the lid of your Dutch oven). Then, bake for an additional 35 minutes. Go for a beautiful dark color on the crust. Remove from the oven and cool on a lifted, wire rack (here's why it's best to let your freshly baked bread rest before cutting).

Let these boules rest for 4 hours or more (preferably overnight!) before cutting into them. The flavor of this bread improves, even more, a few days after baking.
I steamed my oven in my usual way, described here in my post on how to steam your home oven for baking, but you could also bake these boules in a Lodge Combo Cooker to create steam.
Conclusion
While the cost of walnuts can make one hesitant to make this bread it is worth it, trust me. The rich flavor of the toasted walnuts and roasted walnut oil makes this bread a luxurious shift from weeks of white bread. Bread that can break any rut, make you buy more cultured butter at the store than you thought possible, and have you lusting after just one more slice for lunch. Shoot, this is lunch.
Crust

A crackly, crunchy delight. The thin crust reminds me of a cracker just broken at the first bite. When slicing this bread, I find myself moving the knife just a bit more to the side to make sure that one peeking walnut makes it into my slice. Again, an animal.
Crumb

Fabulous for 100% whole grain. The fresh flour and the walnut oil gives this bread a sheen broken only by the purple striations from the tannins in the walnuts. Bread that is light in hand and might make you think there “has to be some white flour in here.”
Taste

The freshly milled flour, at one-hundred-percent, brings so much flavor it’s good on its own. Add the walnuts, though, and you have a winner. I love this bread, plain and simple. I enjoyed it heavily toasted with cultured butter — that's all you need. Healthy, hearty and deeply satisfying meal on its own. Adding 20% walnuts is perfect for this bread: just about every bite has some walnut. However, you can increase this to your liking. Additionally, feel free to increase the walnut oil or leave it out entirely.
Future Modifications
I decided to throw in this section at the end to describe some changes I might attempt for this fresh milled whole wheat walnut sourdough in the future — some things for the avid reader to consider.
Up the hydration
I’d like to try increasing the hydration even more, to perhaps 100%. The walnuts suck up water from the dough, and I think this formula might benefit from about 2-5% more water.
Buon appetito!
If you use this recipe, tag @maurizio on Instagram so I can take a look!
The ability for the dough to stretch out before tearing↩
