Sometimes when baking sourdough bread, the most straightforward recipes prove to be some of the most satisfying. And that's certainly the case with this easy no-knead sourdough bread: this dough is all hand mixed, given a few folds during bulk, proofed overnight, and baked straight away in the morning. No levain to make and no kneading, a bread that, somewhat paradoxically, satisfies more than some of the more complicated and involved recipes and formulas.
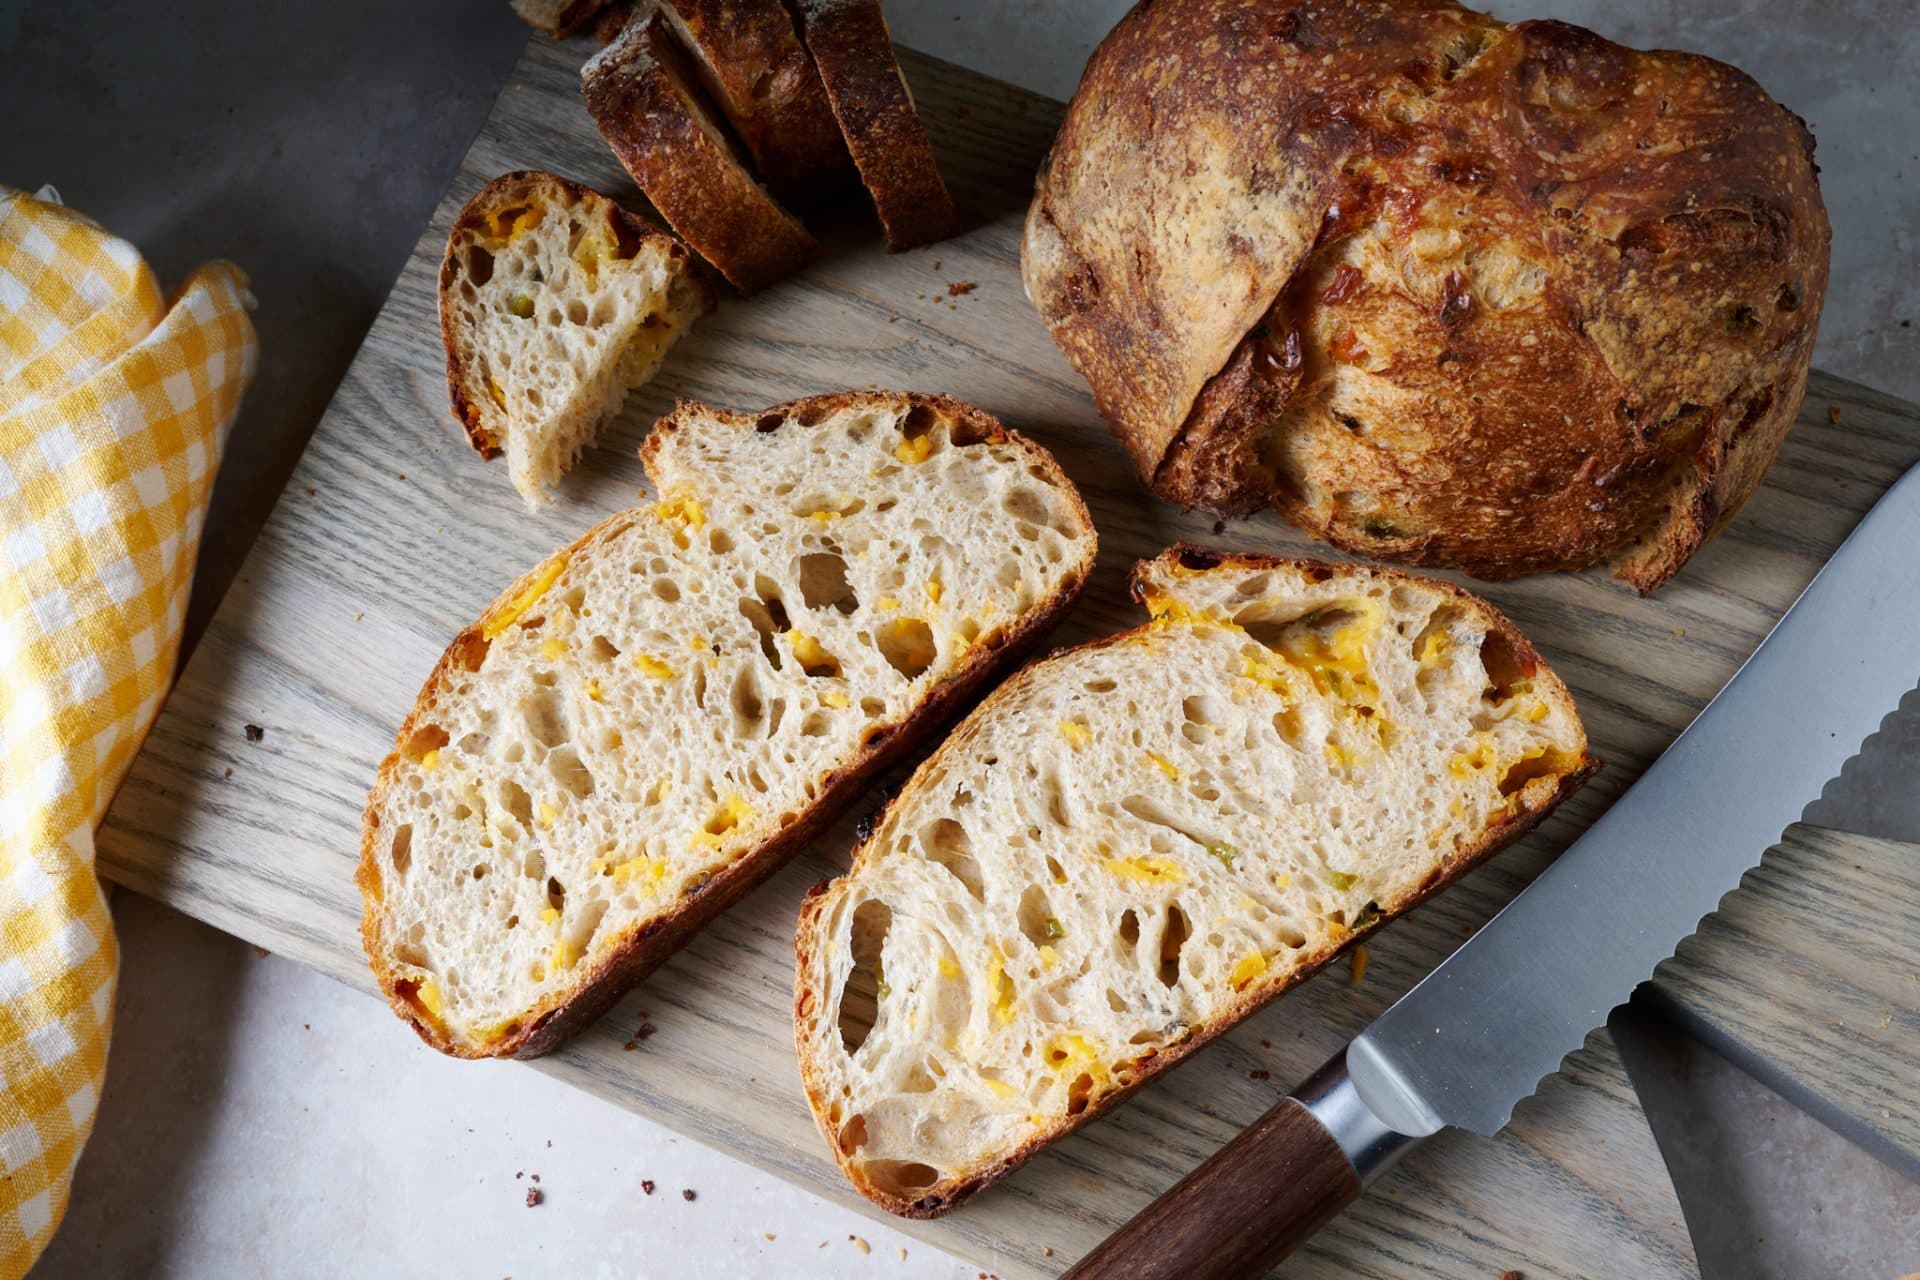
This sourdough bread is the recipe you want to make when you want to spend little time in the kitchen—life!—and you still want a loaf for dinner, or sometimes, you want a no-fuss approach to healthful and delicious bread. The formula is relatively lower hydration compared to many of the high-hydration formulas you'll find here, and this makes for a dough that's easy to handle and a joy to shape. Still, there are no compromises with this no-knead sourdough bread: it has a soft crumb, crunchy crust, satisfying flavor, and beautiful color.
To sum it up, this is why I love this no-knead sourdough bread:
- It uses only two types of flour (both of which are easily picked up at the market)
- There is no kneading or mechanical mixer required
- The medium hydration dough is easy to handle and shape
- The loaf has a beautiful golden crust, a delightful interior texture, and a deep flavor

Flour selection
For this no-knead sourdough bread, I use a mix of medium protein bread flour (all-purpose flour will work) and whole wheat. I like to use lower protein flour for this bread instead of higher protein “bread flour” for improved texture: increased tenderness, softness, and delicate eating quality. Whole wheat brings additional flavor and nutrition, even if not in a significantly high percentage (check out my whole wheat sourdough bread for the other end of the spectrum).

Baking schedule
This bread is very flexible. I like to do a two-day ferment on this dough for additional flavor, retarding it by proofing it overnight in the refrigerator. However, you can bake this in a single day for a more delicate flavor and condensed schedule. Instead of placing the dough into the refrigerator, proof it on the counter for around 2 hours until it passes the poke test: the dough will slowly spring back when poked with a finger.
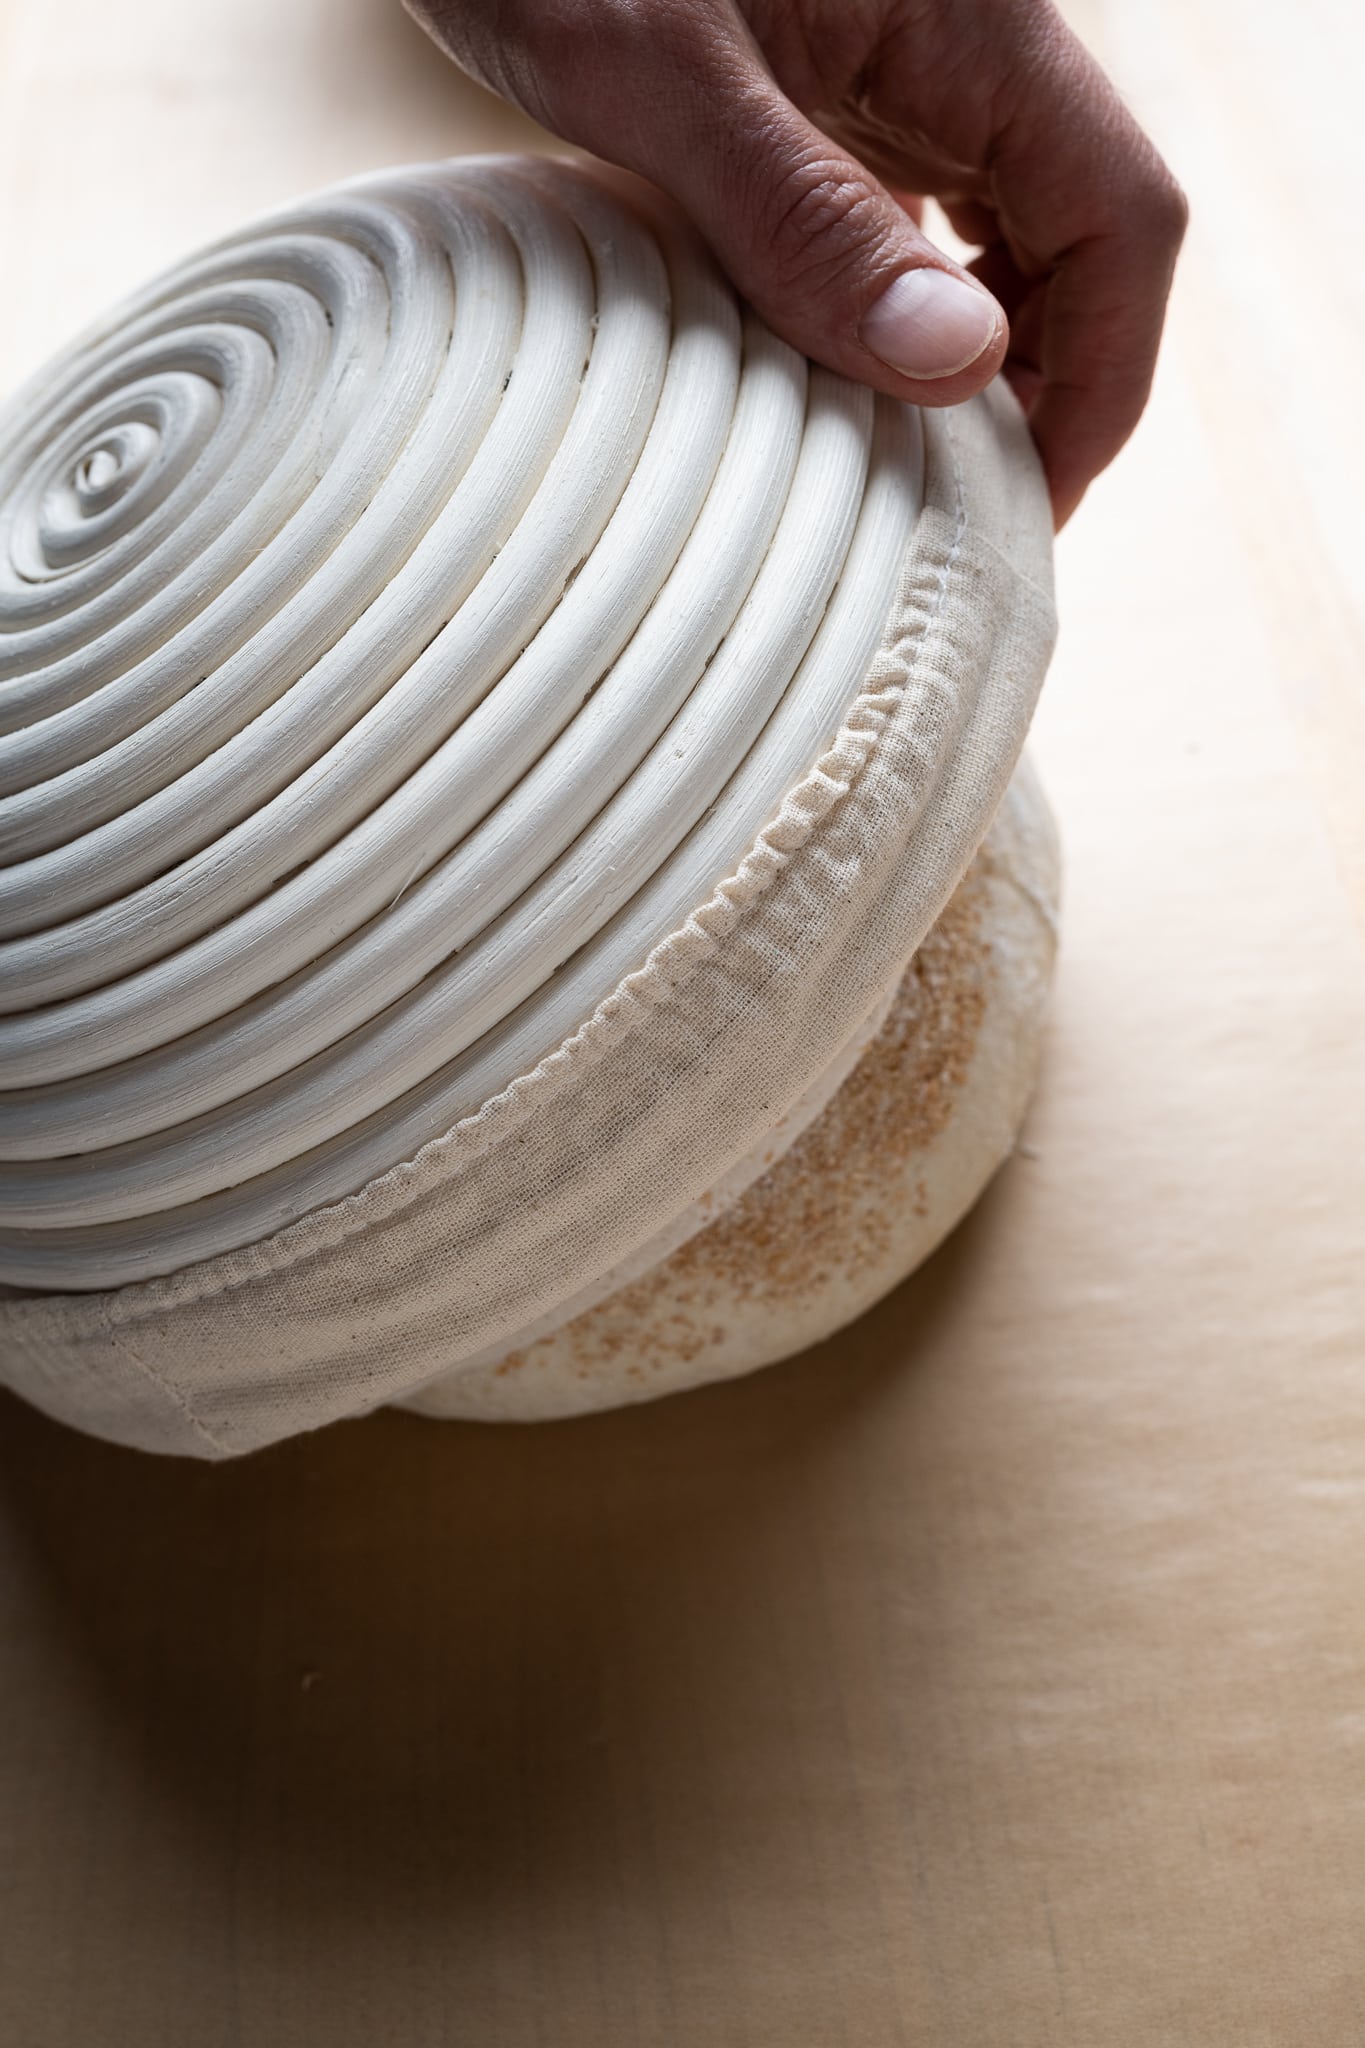
Proofing baskets
For this bread, I'm using a 9-inch round banneton with included liner, which comfortably holds 800g to 900g of dough for this no-knead sourdough bread recipe, but a 10-inch basket will work as well. The liner encourages the dough to remove cleanly from the basket, but if you want to see a spiralized design on your dough, remove the liner and dust the basket with white flour to impart a pattern.
No-knead sourdough bread formula
Vitals
| Total dough weight | 1,600g |
| Hydration | 68.0% |
| Pre-fermented flour | 9.0% |
| Levain percentage in final dough | 18.0% |
| Yield | 2 x 800g loaves |
This recipe can be split in half to make a single loaf of bread following baker's math operations: divide all the ingredients in half.
Total formula
Desired dough temperature: 76°F (24°C). Check out my guide to dough temperatures for more information on the desired and final dough temperatures.
| Weight | Ingredient | Baker’s Percentage |
|---|---|---|
| 767g | Medium-protein bread flour or All-purpose flour (~11% protein, Central Milling Artisan Baker’s Craft or King Arthur Baking All-Purpose) | 90.0% |
| 85g | Whole wheat flour (Central Milling High Pro Fine or King Arthur Baking Whole Wheat Flour) | 10.0% |
| 537g | Water 1 (autolyse) | 63.0% |
| 43g | Water 2 (mix) | 5.0% |
| 15g | Fine sea salt | 1.8% |
| 153g | Ripe sourdough starter, 100% hydration | 18.0% |
No-knead sourdough bread method
1. Autolyse with starter – 9:00 a.m.
Typically, when I perform the autolyse technique, it's simply mixing flour and water and resting for some time. However, this recipe and its reduced hydration help to include the sourdough starter in the flour and water in the recipe.
To a large mixing bowl, add the flour, water 1, and sourdough starter and mix with wet hands until no dry bits remain. Cover the bowl and let rest for 30 minutes in autolyse.
2. Mix – 9:30 a.m.
Add the salt to the top of the dough and pour on water 2 to help it dissolve. Mix by hand until the salt is incorporated and the dough comes together in a single mass. This is no-knead sourdough bread, so it's unnecessary to fold or knead the dough vigorously.

Transfer the dough to a container for bulk fermentation and cover.
3. Bulk fermentation – 9:45 a.m. to 1:15 p.m.
At a warm room temperature, around 74-76°F (23-24°C), bulk should take about 3 1/2 hours. Give the dough four sets of stretches and folds during this time. The first two sets are at 15-minute intervals (10:00 a.m. and 10:15 a.m.), and the last two are at 30-minute intervals (10:45 a.m. and 11:15 a.m.). Perform vigorous stretches and folds, as seen below, for the first 3 sets, then a gentle set for the last set.

After the last set, cover the dough and let it rest until the end of bulk fermentation.
4. Divide and preshape – 1:15 p.m.
At the end of bulk fermentation, the dough should have risen considerably in the bulk container. It will be bubbly, smooth, and elastic, showing signs of significant fermentation.

Gently scrape the dough out of the bulk fermentation container and divide it into two pieces. Shape each piece into a loose round and let rest for 30 minutes, uncovered.
5. Shape – 1:45 p.m.
After the dough has rested and relaxed outward, shape each piece as a boule and place the dough in the proofing basket seam-side-up.
Check out the video below, where I show how I like to shape bread as a boule (round).
After shaping the dough but before placing it in the proofing basket, I rolled the top of the dough (the smooth side) on a bed of coarse wheat bran for a little extra nutrition, flavor, and texture. You could also use wheat bran, rolled oats, white sesame, or omit the topping altogether.
Read my guide to shaping a boule for a more in-depth explanation of shaping →

6. Proof – 2:00 p.m. to 9:00 a.m. (next day)
Cover the baskets with a large, reusable plastic bag and seal them shut. Place the baskets in their bags into the refrigerator overnight.
SAME-DAY OPTION: Instead of retarding the dough overnight, let proof on the counter for about 2 hours until a poke to the dough slowly springs back.
7. Bake – 9:00 a.m.
Preheat your oven with the rack at the bottom third to 450°F (230°C). Place your Dutch oven inside, with the lid and bottom side-by-side.
Take one basket out from the fridge and uncover it. Your dough might not have risen considerably in the fridge, but that's fine. Cut a piece of parchment paper to fit over the basket and place a pizza peel (or large cutting board) on top. Using both hands, flip the entire stack over and remove the basket.
See my guide to baking bread in a Dutch oven for more tips →

Score the dough. I like to create a “box cut” score on top, simply a square with a cross inside. Check out my video of how I like to do this score, here:
After scoring the dough, load it into the Dutch oven; then, bake for 20 minutes, covered. After this time, remove the lid and finish baking for 30-35 minutes or until done. The internal temp should be around 205-210°F (96-99°C) (unless you live at a high altitude).
Remove the loaf to a cooling rack for 2 hours before slicing. Then, return the Dutch oven to the oven (without parchment) and bring it back to temp to bake the second loaf. Follow my guide to storing sourdough bread to keep it fresh for the next week (or freeze it for longer!).

The soft crumb, crunchy crust, and wonderful flavor of this no-knead sourdough bread is a beautiful example of how, when baking, sometimes the best things only need time and require little fuss. Of course, I love a multi-step bake with complicated levain builds and a melange of ingredients as much as the next baker. Still, it's satisfying knowing superlative bread can be made at home simply by stepping back and letting natural fermentation do all the work.
Buon appetito!
Print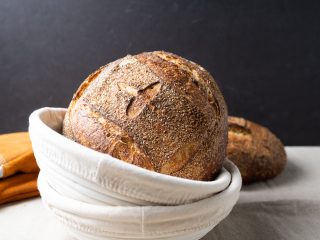
Easy No-Knead Sourdough Bread
- Prep Time: 24 hours
- Cook Time: 55 minutes
- Total Time: 24 hours 55 minutes
- Yield: 2 loaves
- Category: American
Description
My recipe for two loaves of delicious no-knead sourdough bread.
Ingredients
Main dough
- 767g medium-protein bread flour (or all-purpose flour)
- 85g whole wheat flour
- 580g water
- 15g sea salt
- 153g ripe sourdough starter (100% hydration)
Topping
- Coarse wheat bran, rolled oats, or sesame seeds for topping (optional)
Instructions
- Autolyse with starter (9:00 a.m.)
To a large mixing bowl, add the flour, 537g water, and sourdough starter and mix with wet hands until no dry bits remain. Cover the bowl and let rest for 30 minutes in autolyse. - Mix (9:30 a.m.)
Add the salt to the top of the dough and pour on the remaining 43g of water to help dissolve. Mix by hand until the salt is incorporated and the dough comes together in a single mass. Transfer to a bulk fermentation container and cover. - Bulk Fermentation (9:45 a.m. to 1:15 p.m.)
At a warm room temperature, around 74-76°F (23-24°C), bulk should take about 3 1/2 hours. Give the dough four sets of stretches and folds during this time. The first two sets are at 15-minute intervals (10:00 a.m. and 10:15 a.m.) and the last two at 30-minute intervals (10:45 a.m. and 11:15 a.m.). Perform vigorous stretches and folds, as seen below, for the first 3 sets, then a gentle set for the last set. After the last set, let the dough rest for the remainder of bulk fermentation, covered. - Divide and Preshape (1:15 p.m.)
Gently scrape the dough out of the bulk fermentation container and divide it into two pieces. Using wet hands, preshape each piece into a loose round and let rest for 30 minutes, uncovered. - Shape (1:45 p.m.)
Shape each piece of dough into a round (boule), then place the dough in proofing baskets. - Proof (2:00 p.m. to 9:00 a.m., the next day)
Cover proofing baskets with reusable plastic and seal shut. Then, place both baskets into the refrigerator and proof overnight. - Bake (9:00 a.m., the next day)
Preheat your oven with a baking surface or combo cooker/Dutch oven inside to 450°F (230°C).When the oven is preheated, remove your dough from the fridge, score it, and transfer it to the preheated baking surface or combo cooker. Bake for 20 minutes with steam. After this time, vent the steam in the oven or remove the lid (you can keep it in the oven or remove it) and continue to bake for 30 minutes longer. When done, the internal temperature should be around 205°F (96°C).
Let the loaves cool for 2 hours on a wire rack before slicing.
If you use this recipe, tag @maurizio on Instagram so I can take a look!
No-knead sourdough bread troubleshooting
My dough didn't rise in bulk fermentation
Be sure your sourdough starter is healthy, rising and falling predictably each day. It's important to use your sourdough starter when it's ripe for mixing this dough.
My dough was sticky and hard to shape
The dough might have been over-hydrated, under-strengthened, or a little of both. Next time, try reducing the water in the recipe by 25g and give it a fifth set of stretches and folds.
My loaf was gummy and wet inside
Almost always, this is due to either cutting the loaf too early before it had a chance to fully cool and set or it was due to under proofing. If it was under proofing, give the dough plenty of time in bulk fermentation until it has risen significantly, smooths, strengthens, and perhaps has a few bubbles visible.
What's next?
If you're looking for more simple, straightforward—but delicious—loaves, check out some of my other beginner recipes: